Five Tips to Writing RISC-V Assembly
Writing assembly is itself an art. When C, C++, or any other language is compiled, the compiler determines the art of writing assembly. However, this time, we will some of the techniques and decisions we can make to write these ourselves.
We will use RISC-V to see how to design logic, write up the logic, and translate the logic into assembly.
Tip 1: Design the Logic in a Comfortable Language
This is the hardest step to get right with my students. Many students want to sit down and write the complete package. However, if you’re not comfortable with assembly, this is a doomed approach. Instead, to divide the logic from the language, we have to write in a language we understand.
If a student doesn’t know C or some lower-level language, then I suggest they write in pseudocode. Too high of a language will make the translation harder and too low of a language will make the logic design harder. So, I recommend C or C++, or some language at that level.
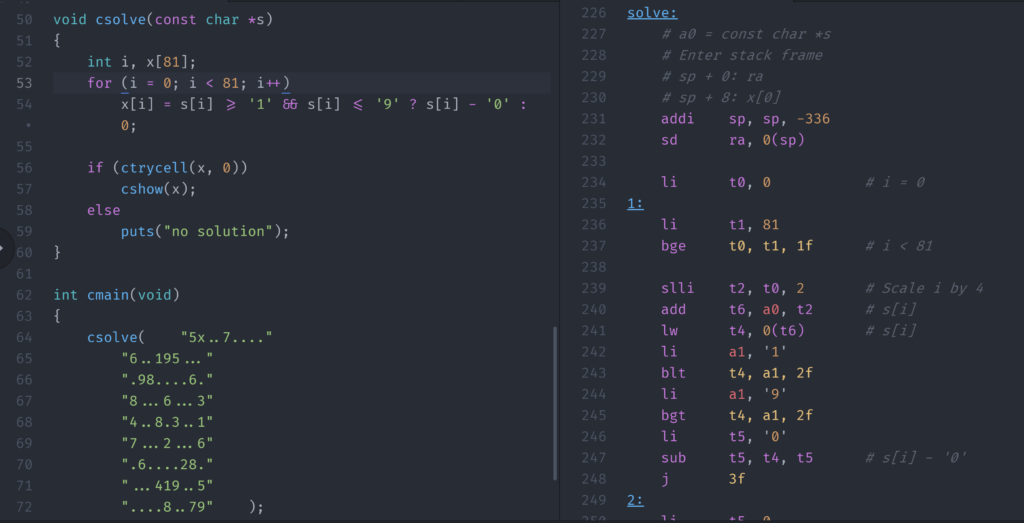
When translating, it is helpful to have some sort of editor that can place them side-by-side. Keeping a list of instructions in your brain is difficult, especially if you’re translating a complex program.
Tip 2: Take Small Bites
Many of my students try to write the entire program from start to finish without testing anything in between. I teach incremental programming, especially for new learners. The point is to test when you get a portion of logic completed. This could be as simple as getting a for loop done, or shifting to scale a pointer.
One way you can test is to link your C or C++ program with your assembly program. You can do this by prototyping the name of the assembly function in C++ and switching between the two. You need to make sure you keep the two different, otherwise your linker won’t be happy. I usually put a “c” in front of my C functions to differentiate. I don’t change the assembly names since in the end, we want all assembly functions to replace the C functions.
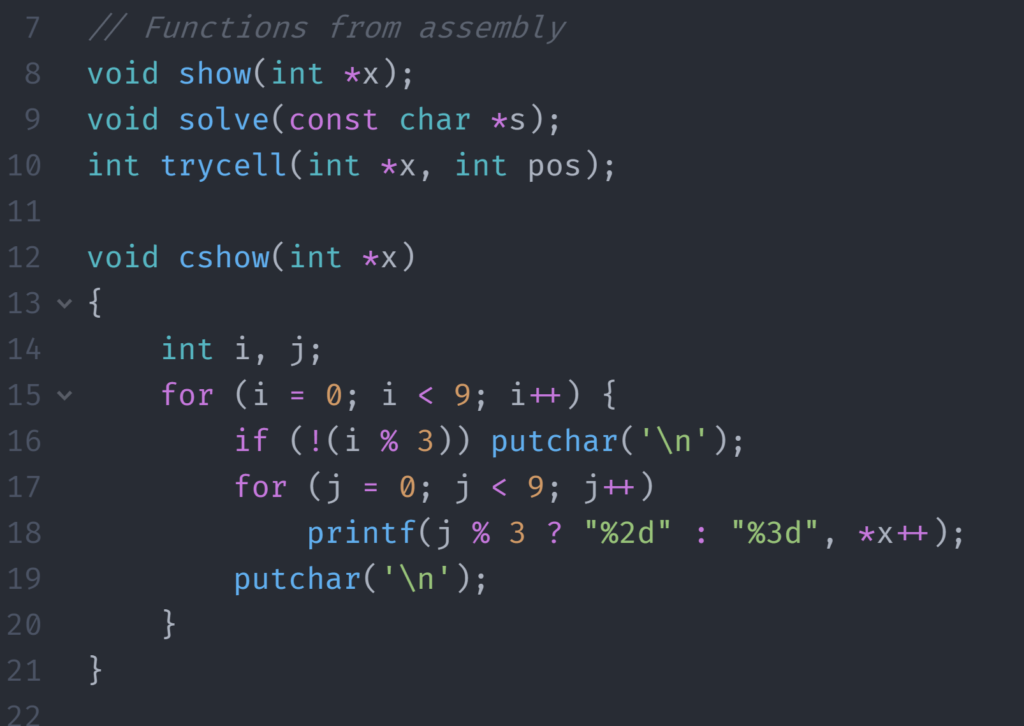
With what I’ve done above, we can call show to run the assembly function or cshow to run the C function. In C++, the names of the functions are mangled to allow for overloading. However, you can turn this off by doing the following:
extern "C" { // Turn off name mangling
    void show(int *x);
}
The extern “C” will tell C++ that the functions follow the C “calling convention”. We really care that name mangling is turned off so that we can just create a label named “show” and have our function.
Tip 3: Know Your Role
As Dwayne “The Rock” Johnson always said, “know your role”. It is important to know what C/C++ was doing for us versus what assembly doesn’t do for us. This includes order of operations. For example, 4 + 3 * 4 will automatically order the operations to perform multiplication first, followed by addition. However, in assembly, we must choose the multiply instruction first followed by the addition instruction. There is no “reordering” performed for us.
Tip 4: Know How to Call a Function
Most ISA architectures will come with a calling convention manual, such as ARM and RISC-V. These just lay down some ground rules to make calling a function work across all languages. Luckily, the “ABI” names of the RISC-V registers really lend to what they mean. Here are some of the rules we need to abide by.
- Integer arguments go in a0-a7, floating point arguments go in fa0-fa7.
- Allocate by subtracting from the stack pointer, deallocate by adding it back.
- The stack must be allocated in chunks of 8.
- All a (argument) and t (temporary) registers must be considered destroyed after a function call. Any time I see the “call” pseudo-instruction, I start thinking about saving registers using the stack.
- All s (saved) registers can be considered saved after a function call.
- If you use any of the saved registers, you must restore their original value before returning.
- Return data back to the caller through the a0 register.
- Don’t forget to save the one and only RA (return address) register any time you see a call instruction (jal or jalr) in your function.
Obviously, I’ve reinterpreted the rules in a more informal way, but you get the jist of what’s going on here.
.global main
main:
    addi    sp, sp, -8
    sd      ra, 0(sp)
    la      a0, test_solve
    call    solve
    mv      a0, zero
    ld      ra, 0(sp)
    addi    sp, sp, 8
    ret
You can see from the code above, we allocate our stack frame first, save all registers that need to be saved, execute, and then undo everything before returning.
Tip 5: Document!
Writing assembly from C or another language will have you writing multiple lines of assembly code for every single line of C code. This can get confusing and utterly frustrating if you’re trying to debug your program. So, I always write the C code as a comment for the assembly and then pull it apart and show each step of me doing it.
# used |= 1 << ( x[i * 9 + col] - 1)
    li      t0, 9
    mul     t1, s3, t0          # t1 = i * 9
    add     t1, t1, s2          # t1 = i * 9 + col
    slli    t2, t1, 2           # Scale by 4
    add     t2, t2, s6          # x + i * 9 + col
    lw      t3, 0(t2)           # x[i * 9 + col]
    addi    t3, t3, -1          # x[i * 9 + col] - 1
    li      t4, 1
    sll     t4, t4, t3          # 1 << x[i * 9 + col] - 1
    or      s5, s5, t4          # used |= ...
You can see from the code above, I have the original C code (first comment), and then inline comments for each piece. This keeps me honest when it comes to order of operations and that I’m doing each step correctly.